
Partial UPDATE: more complete version of How-to followed by notes.
How to install an AI voice generator in minutes (minus the waiting)
This is my updated guide for installing the AI voice generator. I wanted to dig into the code and build a web interface, but anyone who knows me knows that may not happen anytime soon. This guide will take you through the necessary steps to get you up and running so you can make your AI-generated voices.
Of course, this can be fun, but I also think the best way to see what is going on in the world of AI and get a sense of what is real and fake. Imagine 100 years ago, you wouldn’t see other people on TV, but if you saw them in person, you would have a pretty good sense of what they looked like and sounded like. Later you might hear that person on the radio, and you would know it was them. But these days, you can see people often and still not be entirely sure who you saw.
Exposure to AI and AI-generated things is one way to protect yourself moving forward. So let’s get started.
You will want 15 to 50 GB of free space. You can use CPU or GPU, GPU will be faster, of course, but this is a nice project to throw on an older machine and get your feet wet.
- Install Python 3.7 or a later version. It is recommended to use a virtual environment using venv. To make this easier, I’m using miniconda. I’m not a fan of these packaged installers in general, but when showing my friend how to set this up, we had a much easier time using miniconda than straight python, so that is what I’m recommending. If you know what you’re doing, then try the version from Python.org first to see if you can get it going (send me errors in the comments I’ll try to help out).
- Install FFmpeg by following the instructions at https://ffmpeg.org/download.html#get-packages. This is necessary for reading audio files. (screenshots for download) (screenshots for installation or another guide)
- Install PyTorch by following the instructions at https://pytorch.org/get-started/locally/. Pick the latest stable version, your operating system, your package manager (pip by default), and either a CUDA version if you have a GPU or CPU if you do not. Run the command that is provided.
- Install the remaining requirements by running pip install -r requirements.txt
- (Optional) Download pre-trained models by following the instructions in the repository’s README file. These models can be used to speed up the training process. Check out what is available here: http://www.openslr.org/12/ I don’t know what the limitations are so you will want to test out different models and see what works best.
- (Optional) Test your configuration by running python demo_cli.py. This will run a series of tests to ensure everything is set up correctly.
- (Optional) Download datasets by following the instructions in the repository’s README file. These datasets can be used to train the model and improve its performance.
- Use the project to generate speech from text or clone a voice following the repository’s README file instructions. This typically involves running Python scripts with appropriate command-line arguments.
*note on update: the install took much longer than anticipated, so I’m not finished getting the pics and collecting the information for the guide. Check back again.
Some people will hate that I’m starting another AI instructional post before I have simplified my Stable Diffusion post. Still, I started down a path of seeing what I could get running for now, and right now, I’m trying different things to see what works best for different situations.
Again this is more notes so I can come back and reference things later to aid in the installation and running of the AI. So if you are having trouble reading through this, remember each linked project has a readme that will get you 90% of the way there, and this post should help you will the last 10%.
What we are doing: [1806.04558] Transfer Learning from Speaker Verification to Multispeaker Text-To-Speech Synthesis (arxiv.org)
Samples by other people: Audio samples from “Real Time Spectrogram Inversion on Mobile Phone” (google.github.io)
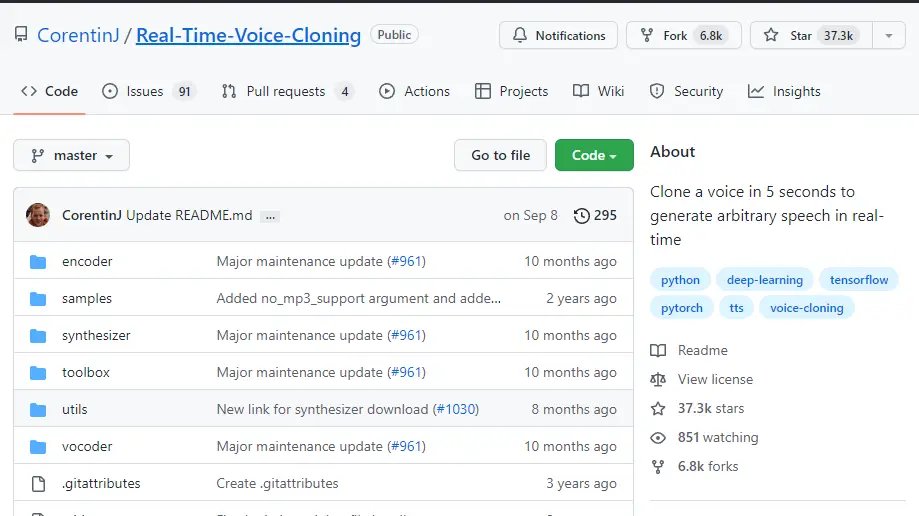
We are starting with this project which can take seconds of a voice and make relatively accurate replicas.
https://github.com/CorentinJ/Real-Time-Voice-Cloning
Miniconda makes it easier
https://conda.io/projects/conda/en/latest/user-guide/install/download.html
The first challenge was FFmpeg. I don’t remember it being so difficult, but I haven’t installed this on anything in more than five years. You have to find a place to put the exes and then add them to the path:
https://ffmpeg.org/download.html#get-packages
It really won’t matter which version you choose at the end of the day.
Pytorch
https://pytorch.org/get-started/locally/
It sometimes leaves me cussing, but everything works with this. Get the most up-to-date, stable version… However, that is what the doc says, and I only had luck with 11.3

Of course, I’m picking CUDA to use my GPU, and ROCm is only available on Linux. You can also choose CPU if you don’t have NVIDIA.
Hardest Part
Windows 10, Windows 11, Python 3.5-3.10, we were getting this error: Running setup.py install for webrtcvad … error
Of course, that is not the exact error, the entire thing was related to the webrtcvad and needing build tools from Microsoft. My understanding is it just works on Linux. This might mean you can use the Linux subsystem for Windows to run this, but I’m not diving that deep right now.
https://1drv.ms/u/s!ArwTiQLcEIO-gqtyL6JcjzDdv_4wcw?e=6u5Iuz
Please don’t use this link. It won’t be around long. Just look up vs_BuildTools you will need this for one of the packages. Get the most up-to-date C++ build tools. I’ll provide a screenshot later.
Run the test cli file on the first run after installing requirements. If it asks for a file, it will generate output, and you will know things are working. But to get the full effect and better outcome, run the other main file to get a decent GUI.
Odd Errors
When helping a friend set this up, we kept seeing the Microsoft Store open when typing Python in the command line. There is an execution setting to turn off. We did this and then added the exe to the path again for Miniconda, but we still had to re-install Python and make sure to select the “add to path” options in the installer. Once we did that, things worked.
Search App execution aliases in your Windows 10/11 settings to find the setting. My friend is on Windows 11, and I’m on Windows 10, but I didn’t have that error, maybe because I always let Python add itself to the path. An interesting note about this is we saw no change in the Path variables before and after running the installer again, so there might be an additional registry key or something we missed.
Alternative Projects I’ll Try Later
resemble-ai/Resemblyzer: A python package to analyze and compare voices with deep learning (github.com) – This seems to be by the same people that did the project we tried above, or they both source from each other. This project is very interesting and worth taking a look at due to the advanced nature of the output and speed.
Omniverse Audio2Face AI Powered Application | NVIDIA – NVIDIA has a tool that can match the voice produced to a character. This might make character generation very easy and will likely have implications for things like VR chat.
NVIDIA/tacotron2: Tacotron 2 – PyTorch implementation with faster-than-realtime inference (github.com) – This is likely the next thing I try from this list.
Found this while poking around – Projects – NVIDIA ADLR (nv-adlr.github.io)